

Nothing ruins a night in the backcountry like sliding into a damp sleeping bag. You have earned that cozy sleep after a long day on the trail, but moisture—whether from rain, condensation, a river crossing gone wrong, or just your own breath—can turn your shelter into a cold, miserable trap. The good news: experienced campers have developed reliable methods to prevent, manage, and fix a wet sleeping bag, whether you are car camping at a developed site or pushing hard through week two of a Pacific Crest Trail thru-hike. This guide covers prevention tactics for every season, field-tested drying techniques, gear recommendations, and emergency strategies so that wet weather never ruins your sleep.
How to Stay Dry in a Wet Sleeping Bag: Prevention, Recovery, and Gear That Works
A wet sleeping bag is not just uncomfortable—it can be dangerous. According to the National Weather Service, hypothermia can set in at temperatures as high as 10°C (50°F) when a person is wet and exposed to wind. Your sleeping bag is your last line of defense against cold. Keeping it dry is a skill every outdoor enthusiast needs to master, from weekend car campers to long-distance thru-hikers tackling routes like the Appalachian Trail or the John Muir Trail.
In eco-camping circles, it’s common knowledge that Leave No Trace is the baseline: pack out what you pack in, camp on durable surfaces, and keep campfires small and contained.
Related Topics You May Find Helpful
Depending on your experience level and the type of trip you are planning, the best approach to staying dry in your sleeping bag can look very different. Here are the most common situations campers face.
1. Car Camping vs. Backpacking: Different Constraints, Different Solutions
If you drive to your campsite, weight and pack size are irrelevant. You can bring a thick foam pad, a heavyweight waterproof tarp, and even a second sleeping bag as a backup. Backpackers, on the other hand, count every gram. A thru-hiker carrying a 40–50 liter pack (about 2,400–3,100 cubic inches) needs a sleeping bag or quilt that compresses small and weighs under 680 grams (1.5 pounds). The solution for a backpacker is strategic layering: a waterproof bivy sack combined with a lightweight dry bag for storage, rather than a heavy waterproof shell.
Summary: Car campers can rely on bulkier waterproof solutions like heavy tarps and backup bags. Backpackers need ultralight prevention: a waterproof stuff sack and a breathable bivy cover weighing under 400 grams (14 ounces).
2. Down vs. Synthetic Insulation: Know What You Are Carrying

Down sleeping bags offer the best warmth-to-weight ratio on the market and compress smaller than any synthetic alternative. A quality down bag with 850+ fill power can lose nearly all of its insulating loft once wet, however, and can take two to three times longer to dry than synthetic. According to REI’s gear experts, synthetic insulation retains about 70–80 percent of its warmth when damp and dries significantly faster than down. Modern treated down (often called hydrophobic down) resists moisture for short exposure, but sustained wet conditions still overwhelm the treatment.
Summary: Down bags are lighter and more compressible but lose almost all insulation when soaked. Synthetic bags retain warmth when damp and dry faster, making them the safer choice for consistently wet environments like the Pacific Northwest or coastal Scotland.
3. Summer Rain vs. Winter Condensation: Two Different Moisture Sources
Summer moisture is usually rain leaking through tent seams, splash from puddles, or a bag brushing against a wet tent wall. Winter moisture is predominantly condensation from your own breath. When overnight temperatures drop below −5°C (23°F), the warm, humid air you exhale freezes on the inside of your tent or bivy in a layer of frost that melts onto your bag when you move in the morning. Winter campers combat this with greater tent ventilation, vapor barrier liners, and shaking frost off before packing. Summer campers focus on seam sealing, footprint groundsheets, and choosing well-drained campsites.
Summary: Summer wet bags come from rain and ground splash; winter wet bags come from internal condensation and breath frost. Prevention strategies differ: summer needs seam-sealed shelter and dry campsites; winter needs vapor barrier liners and aggressive tent ventilation.
4. Emergency Survival: When Your Bag Gets Soaked Mid-Trip
If your bag gets thoroughly wet mid-trip—falling into a stream, a tent failure in a downpour, or a canoe flip—the situation escalates quickly. The first rule from wilderness medicine experts is to avoid panic and prioritize movement toward safety. The “human burrito” technique, used in wilderness medicine to treat hypothermia, involves wrapping yourself in a dry tarp or tent body with all your dry clothing layers and a sleeping pad underneath, then adding a partner for shared body heat if available. Hot water bottles (filled from your stove and placed in socks) inside this wrap can raise core temperature significantly.
If you are within a day’s hike of a town, hiking out to use a commercial dryer is faster and safer than trying to dry a soaking bag in the field. SectionHiker, a respected backpacking resource, emphasizes that even a high-power commercial dryer takes three or more hours to dry a soaked down bag fully. By comparison, hanging a wet bag from a tree in good weather can take 12–24 hours.

Summary: A fully soaked sleeping bag is a survival emergency, not a comfort problem. Hike out to a town with a dryer if possible. In the field, use a human burrito wrap with shared body heat and hot water bottles until you can reach safety.
7 Proven Strategies to Prevent Your Sleeping Bag from Getting Wet
Prevention is always easier than recovery. These seven strategies cover the most common moisture entry points for a sleeping bag.
- Use a waterproof bivy sack. A bivy sack is effectively a waterproof jacket for your sleeping bag. It adds 5–10°F (3–5°C) of warmth and prevents both rain and ground moisture from reaching the bag fabric. Look for a model with a hydrostatic head rating of at least 5,000–10,000 mm for reliable rain protection. The Litume Bivy Sack offers a 12,000 mm waterproof rating and folds to the size of a water bottle at just 400 grams (14 ounces).
- Store your bag in a dedicated waterproof dry sack. Never store your sleeping bag loose in your pack. A roll-top dry bag like the Snugpak Dri-Sak ensures the bag stays bone-dry even if you fall in a creek, get caught in a cloudburst, or set your pack down in standing water.
- Choose a well-drained campsite. Pitch your tent on a slight rise, not in a depression. Even a 15 cm (6-inch) elevation advantage can keep water from pooling under your tent floor. Look for sites with natural drainage and avoid dry creek beds, which can flash flood after upstream rain.
- Use a groundsheet or tent footprint. A polycro or Tyvek groundsheet beneath your tent floor prevents ground moisture from wicking through. This is especially important in spring when the ground holds meltwater even on sunny days.
- Ventilate your tent aggressively. Condensation is the most common source of sleeping bag moisture. Open vent ports, leave the door slightly ajar (if no rain), and avoid sealing yourself in completely. A well-ventilated tent reduces internal humidity by 20–40 percent compared to a sealed one.
- Never touch the tent walls. Position your sleeping pad so your bag does not make contact with the tent body. Even waterproof tent fabrics accumulate condensation on their inner surface, and contact wicks moisture directly into the bag.
- Use a sleeping bag liner. A fleece or silk liner keeps body oils and sweat off the bag’s insulation. On multi-day trips, you can wash the liner and let it dry while the bag itself stays clean and dry. A liner also adds 8–15°F (4–8°C) of warmth.
How to Dry a Wet Sleeping Bag in the Field
If your bag is already damp, time and technique matter. Here is the best sequence for drying in the backcountry, ranked from most to least effective.
Option 1: Sun and Wind Drying (Best for Damp Bags, 1–3 Hours)
On a sunny day with a light breeze, hang your bag fully unzipped over a clothesline or a fallen log. Flip it every 30 minutes. A 700-fill down bag that is merely damp (not soaked) can regain full loft in about two hours under direct sun at 21°C (70°F). Synthetic bags dry faster, often in under an hour. The ultraviolet exposure also helps kill any mildew spores that may have started growing overnight.
Option 2: Body Heat Drying (Good for Slightly Damp Bags, Overnight)
If rain persists and you cannot sun-dry, use your own body heat. Sleep in the bag as normal but wear a moisture-wicking base layer. The heat generated by your body (about 75–100 watts of thermal output at rest) evaporates moisture from the bag’s interior toward the outer shell. This works best if you pair the bag with a vapor barrier liner, which prevents your sweat from adding new moisture to the equation.
Option 3: The Lunch-Break Air-Out (Multi-Day Trips)
Experienced thru-hikers on the Appalachian Trail and Pacific Crest Trail make it a ritual to spread their sleeping bag across their pack or a bush during every long lunch break. Even 30 minutes of airflow prevents moisture from accumulating day after day. On the Appalachian Trail, many hikers report that this daily air-out is the single most important habit for keeping their gear functional over a five-month thru-hike.
Option 4: Towel Absorption (Heavy but Effective)

A lightweight camp towel (preferably microfiber, about the size of a bandana) can wick significant moisture out of a wet bag. Lay the towel flat on the damp area, press firmly, and repeat with the dry end. Over 10–15 minutes, this can remove 40–60 percent of the free water from a localized wet spot.
What NOT to Do
- Do not dry a sleeping bag by a campfire. The intense heat melts nylon and polyester fabrics, destroys down loft with singed feathers, and leaves the bag smelling of smoke for weeks. The risk of permanent damage far outweighs any benefit.
- Do not wring or twist a wet bag. Squeeze gently instead. Twisting can tear internal baffles and clump insulation.
- Do not pack a damp bag for more than 24 hours without airing it out. Bacteria and mildew begin colonizing within that window, especially in warm conditions.
How to Dry a Sleeping Bag at Home
Once you return from a trip with a wet bag, proper home drying is essential to prevent mildew and restore loft.
For Down Sleeping Bags
- Place the bag in a front-loading commercial dryer on low heat (no heat is safer if you have time).
- Add three clean tennis balls or dryer balls to break up down clumps as the bag dries.
- Drying a fully wet down bag takes 3–5 hours in a commercial dryer. Check every hour and redistribute the down clusters.
- Alternatively, hang the bag flat across two parallel drying racks or a clean clothesline in a warm, ventilated room. Expect 24–48 hours.
For Synthetic Sleeping Bags
- Synthetic bags tolerate higher heat. Use a medium setting in a front-loader dryer.
- Drying time is typically 1–2 hours.
- Dryer balls help redistribute synthetic fibers but are less critical than with down.
- Hang-drying a synthetic bag takes 12–18 hours in a well-ventilated room.
Gear Comparison: Best Waterproof Protection for Your Sleeping Bag
The table below compares four reliable options for keeping your sleeping bag dry, ranging from a full bivy system to a simple dry sack.
| Product | Type | Weight | Waterproof Rating | Best For |
|---|---|---|---|---|
| Litume Bivy Sack | Bivy Sack | 400 g (14 oz) | 12,000 mm | Ultralight backpacking, rain conditions |
| AquaQuest Pharaoh Bivy Sack | Bivy Sack | 500 g (17.5 oz) | 10,000 mm | Stealth camping, multi-day trips |
| Yundxi Bivy Sack | Bivy Sack | 340 g (12 oz) | 5,000 mm | Budget-friendly, summer trips |
| Snugpak Dri-Sak | Storage Dry Bag | 110 g (3.9 oz) | Fully waterproof | Pack storage, canoe/kayak trips |
For most three-season backpacking scenarios, the ideal combination is a waterproof bivy sack for camping plus a lightweight dry sack for pack storage. This dual-layer approach ensures your bag stays dry both during transit and through a rainy night.
A wet sleeping bag is a safety problem before it is a comfort problem, because insulation stops insulating when it is damp. A bivy sack is the cheapest reliable insurance against the ground and dew, and campers who carry one also use it as a dry changing room on rainy evenings.
Real-World Scenarios: How Conditions Change the Approach
Scenario A: The Pacific Crest Trail in July (Dry Alpine)
In the Sierra Nevada section of the Pacific Crest Trail, summer weather is generally dry with brief afternoon thunderstorms. Condensation from sleeping under a tarp is the main moisture risk. A down quilt in a waterproof stuff sack, paired with a lightweight bivy for splash protection, is ideal. Daily air-outs during lunch breaks prevent cumulative dampness.
Scenario B: The Olympic Peninsula in November (Wet Coastal)

Consistent rain, high humidity, and temperatures just above freezing define this environment. A synthetic sleeping bag is strongly recommended because it retains insulation when damp. A fully waterproof bivy sack with taped seams (10,000+ mm hydrostatic head) is essential. Expect to pack your bag wet some mornings and dry it during afternoon breaks.
Scenario C: Boundary Waters Canoe Area in June (Humid and Buggy)
Canoe trips bring the risk of a flipped boat plus high humidity from proximity to water. A dry bag rated for submersion (roll-top or dry-box style) is mandatory for pack storage. A synthetic bag or treated-down bag combined with a mesh tent for ventilation provides the best humidity management.
Scenario D: Winter Camping in Colorado (Dry Snow, Frost)
Below freezing, the moisture problem shifts to internal frost. A vapor barrier liner (VBL) worn against the skin traps body moisture before it can migrate into the bag. Combined with a high-loft down bag and a winter bivy, this setup keeps the insulation bone-dry even after a week in sub-zero conditions. The VBL feels clammy but is proven to keep down insulation dry in temperatures below −10°C (14°F).
What We Covered for Staying Dry in a Wet Sleeping Bag
- Prevention is faster than recovery: use a waterproof stuff sack and a bivy cover as standard practice.
- Synthetic insulation retains 70–80% of its warmth when damp and dries faster than down, making it the better choice for wet climates.
- Daily air-outs during multi-day trips prevent moisture from accumulating and causing mildew.
- A commercial dryer takes 3–5 hours to dry a fully wet down bag; never use a campfire.
- Winter condensation from breath frost is managed with vapor barrier liners and tent ventilation, not just waterproof shells.
- If your bag becomes fully soaked and you are far from town, use the human burrito technique with a dry tarp, extra clothing, and shared body heat.
Frequently Asked Questions
Can a down sleeping bag be used in wet conditions?
Yes, with proper precautions. A waterproof bivy sack and a dry storage bag can keep a treated-down bag dry through most rain conditions. The risk increases during multi-day wet trips above treeline where prolonged moisture exposure can overwhelm even treated down.
How long does it take for a wet sleeping bag to develop mildew?
Mildew can begin colonizing a damp sleeping bag within 24–48 hours in warm, humid conditions. Low-loft, musty-smelling areas indicate mildew growth, which can permanently damage the insulation. Always air out a damp bag as soon as possible.
Is a sleeping bag liner worth carrying?
Yes, for three reasons: a liner keeps body oils off the main insulation (extending time between washes), adds 8–15°F (4–8°C) of warmth, and can be washed and dried quickly on the trail while the bag stays clean. Silk liners are lightest; fleece liners are warmest when damp.
Can I use a tent footprint as a sleeping bag cover?
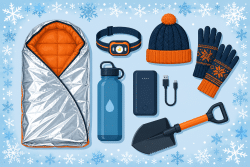
In an emergency, wrapping yourself in a dry tent footprint or tarp can prevent hypothermia, but it is not a long-term solution. Unlike a breathable bivy sack, a non-breathable groundsheet traps condensation, which will soak your bag from the inside within hours. Use this only as a last resort.
How do I restore loft after my bag gets wet?
For down bags, a full wash using a down-specific cleaner (avoid standard detergents, which strip natural oils) followed by a low-heat dryer with three clean tennis balls restores loft best. For synthetic bags, a gentle wash and dryer cycle on medium heat brings the fibers back to normal. Both processes can take 3–5 hours of drying time.
Sources
- SectionHiker: What to do if your sleeping bag gets wet on a backpacking trip
- REI Expert Advice: How to Wash and Dry a Sleeping Bag
- National Weather Service: Cold Water Hypothermia Safety
- Therm-a-Rest: Synthetic vs. Down Sleeping Bags
- Enlightened Equipment: Down vs Synthetic Sleeping Bag Comparison
- Advnture: The Best Bivy Sacks for Every Kind of Lightweight Camping