

Camping crafts work best when they are quick, portable, and produce something a child is proud to show off. The projects that fit that description — paper lanterns, happy camper crowns, yarn-wrapped pine cones, and printable activity sheets — share three traits: they take under 20 minutes, use a handful of supplies, and leave room for a child’s own choices. This guide covers a rotation of reliable camping crafts organized by what they build, plus how to pace craft time across a multi-day trip so it stays fresh.
Camping Crafts: A Rotation of Quick Projects for the Whole Trip
Sponsored: This article contains product links. We may earn a commission on qualifying purchases at no extra cost to you.
Why a Craft Rotation Beats One Big Project
A multi-day camping trip needs craft variety, not one elaborate project. A rotation of short crafts — one per day, each under 20 minutes — keeps children engaged without exhausting the supply kit or their attention. Each craft builds a different skill: lanterns build spatial thinking, crowns build decoration and pride, yarn projects build fine motor control, and printables build early literacy and number skills. Rotating also means a rainy day or a low-energy afternoon always has a fresh activity ready.
Summary: A rotation of short crafts — one per day, each under 20 minutes — keeps children engaged across a multi-day trip while building different skills with the same small supply kit.
The Core Supply Kit
These supplies cover the entire rotation:
Twist crayons. Chunky, washable, non-toxic. The JUPITEARTH 12-color twist crayons (see the twist crayons) handle drawing, decorating, and rubbing.

Paint sticks. Solid color with no brushes or water. The JUPITEARTH 24-color paint sticks (browse the paint sticks) are the most camp-friendly paint.
Washable markers. The Crayola Ultra Clean markers (check the washable markers) for details and printables.
Yarn and twine. For wrapping, hanging, and weaving.
Card stock, glue, googly eyes, and a hole punch. The structural supplies.
Found materials. Pine cones, pebbles, and leaves collected at the site.
The Craft Rotation
Day 1: Paper Lantern
Decorate a paper strip with paint sticks, fold it accordion-style, and tape into a lantern. Add a battery tea light (an LED tealight is safest) for a glow that needs no fire. Hang lanterns at the tent entrance — instant campsite decoration the children made themselves.
Day 2: Happy Camper Crown
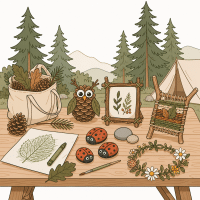
Decorate a paper crown with markers and stickers, then add a “Happy Camper” badge. The crown feeds dramatic play — children wearing it can “lead” the hike or “guard” the campsite.
Day 3: Yarn-Wrapped Pine Cone
Wrap a pine cone with yarn or twine, tuck in a few leaves, and add googly eyes to make a creature. Wrapping builds fine motor control and the results vary by child.
Day 4: Leaf Rubbing
Place leaves under paper and rub a twist crayon sideways over them. The veins appear instantly. Collect leaves on the morning walk, rub them in the afternoon.
Day 5: Pebble Tic-Tac-Toe
Draw a tic-tac-toe board on a flat rock with a paint stick, then use two sets of nature pieces — pebbles vs. pine cones — as the marks. A craft that becomes a game.
Day 6: Printable Camping Activities
Bring a few printed camping activity sheets — mazes, dot-to-dots, word searches, and coloring pages. These are the calm, quiet activity for rest time or the car ride home.
Day 7: Nature Weaving
Weave leaves, grass, and thin twigs through a cardboard loom or forked stick. A textured wall hanging that captures the site’s plants.
Pacing Craft Time Across the Trip

The rotation works best with three rules:
One craft per day. Schedule craft time for the afternoon lull — after lunch, before the evening fire — when children need a seated activity.
Prepare the night before. Pre-cut shapes and sort supplies the evening before so the craft session starts immediately.
Stop while it’s fun. End each session while children are still engaged. A 15-minute successful craft beats a 40-minute one that ends in frustration.
Best craft by skill focus:
| Skill | Best craft | Age range |
|---|---|---|
| Spatial thinking | Paper lantern | 4+ |
| Fine motor | Yarn-wrapped pine cone | 3+ |
| Decoration and pride | Happy camper crown | 2+ |
| Observation | Leaf rubbing | 3+ |
| Game design | Pebble tic-tac-toe | 5+ |
| Literacy | Printable sheets | 4+ |
Related Topics You May Find Helpful
What Are the Easiest Camping Crafts for Kids?
Leaf rubbings, paper lanterns, and painted pebbles are the easiest — each needs only one or two supplies and takes under 15 minutes. They also produce items children can use or display.
How Do You Keep Kids Entertained with Crafts at Camp?

Rotate one short craft per day, prepare supplies the night before, and pair each craft with a related activity — collect leaves for rubbing, hunt for pebbles for tic-tac-toe. The collecting becomes part of the craft.
What Camping Crafts Are Good for Rainy Days?
Printable activity sheets, yarn wrapping, and paper lanterns work well indoors — they need only a table and supplies. Keep a “rainy day pouch” with printables and yarn ready in the gear bin.
Frequently Asked Questions About Camping Crafts
How many craft supplies should I pack?
One small caddy with twist crayons, paint sticks, markers, yarn, glue, googly eyes, card stock, and a hole punch covers a full craft rotation. Add printables and found materials collected at the site.
Are camping crafts suitable for toddlers?
Yes, with age-appropriate projects. Toddlers can decorate crowns, press leaves onto glue, and do simple leaf rubbings. Avoid small parts that pose choking hazards for children under 3.
How do I handle craft cleanup at a campsite?
Cover the table with a vinyl cloth, keep a damp cloth and water bowl nearby, and collect all craft debris before leaving the site. Use washable supplies so cleanup is a wipe, not a project.
Key Takeaways
- A rotation of one short craft per day keeps children engaged across a multi-day trip.
- Lanterns, crowns, yarn-wrapped pine cones, leaf rubbings, and pebble games cover a range of skills.
- One small caddy of washable supplies supports the whole rotation.
- Prepare supplies the night before and stop each session while it is still fun.
- Keep printables and yarn in a “rainy day pouch” for indoor craft sessions.